Lens flare is a phenomenon that happens when light is scattered from a bright light source and creates colored circles, rings, starbursts, etc. on the trot. In photography, lens flare can be generated by a bright light entering the camera lens and hitting the camera sensor.
Lens flare has the magic to produce a visual appeal in your images. If you wish to add lens flare to your photography, all you have to do is point and shoot your photos toward the sunlight or any artificial light source like a flashlight. With this method, your photography is likely to boast lens flare.
Lens flare can inject a warm softness to backlit portraits, create exceptional landscape shots, and let you notch up a cinematic or sun-drenched appearance. And you know the best part? Besides bringing out lens flare to your image with a camera, you can even produce it with Adobe Photoshop!
How to Add Lens Flare in Photoshop (Easy Steps)
Photoshop allows creating lens flare just by following some easy and simple steps. It doesn?t require any craft to apply in order to achieve lens flare in your image.
Open your Image in Photoshop
Before you do anything, open an image with a light source in Photoshop. Then, unlock the background layer followed by creating a new layer. Then, rename the new layer
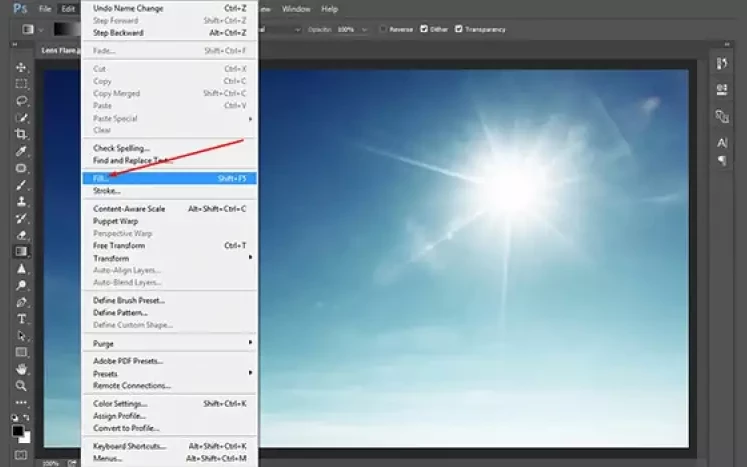
Fill the New Layer
Now, navigate to the menu bar and select ?Fill? from the list of items. The purpose is to fill the entire layer with black color.
Apply the Lens Flare
A dialog box will appear showing lens flare on a canvas with a number of options. Choose your desired option and hit the Ok button. Lens flare will show up on the image immediately.
Step-by-Step Guide for E-commerce Businesses and Photographers
Adding a lens flare to your images can enhance their visual appeal and give them a professional touch. Follow these simple steps to apply lens flare using Photoshop.
Step 1: Open Your Image
Open Photoshop and load the image you want to edit. Ensure the image is high-quality for the best results.
Step 2: Create a New Layer
Create a new layer by clicking on the "New Layer" icon at the bottom of the Layers panel. This allows you to work non-destructively.
Step 3: Fill the Layer with Black
Fill the new layer with black by selecting the Paint Bucket tool and clicking on the canvas. Change the layer blend mode to "Screen" to make the black invisible.
Step 4: Add Lens Flare
Go to the top menu and select Filter Render Lens Flare. A dialogue box will appear where you can adjust the lens flare settings.
Brightness: Adjust the brightness slider to control the intensity of the flare.
Lens Type: Choose from different lens types to get the desired effect.
Step 5: Position the Lens Flare
In the Lens Flare dialogue box, click on the preview image to position the flare where you want it to appear. Click "OK" to apply the effect.
Step 6: Fine-Tune the Effect
If necessary, adjust the opacity of the lens flare layer to make the effect more subtle. You can also use the Eraser tool to remove parts of the flare if it's too strong in certain areas.

Md Forhad Hossen
Meet Forhad! A technical writer with a Computer Science background. He combines her academic knowledge & creativity to transform complex facts into engaging content. With a sharp eye for detail, she keeps readers updated on tech trends. linkedin